Creating appointments and rehearsals
Add rehearsals and events to your choir calendar, including recurring appointments.
Web + app
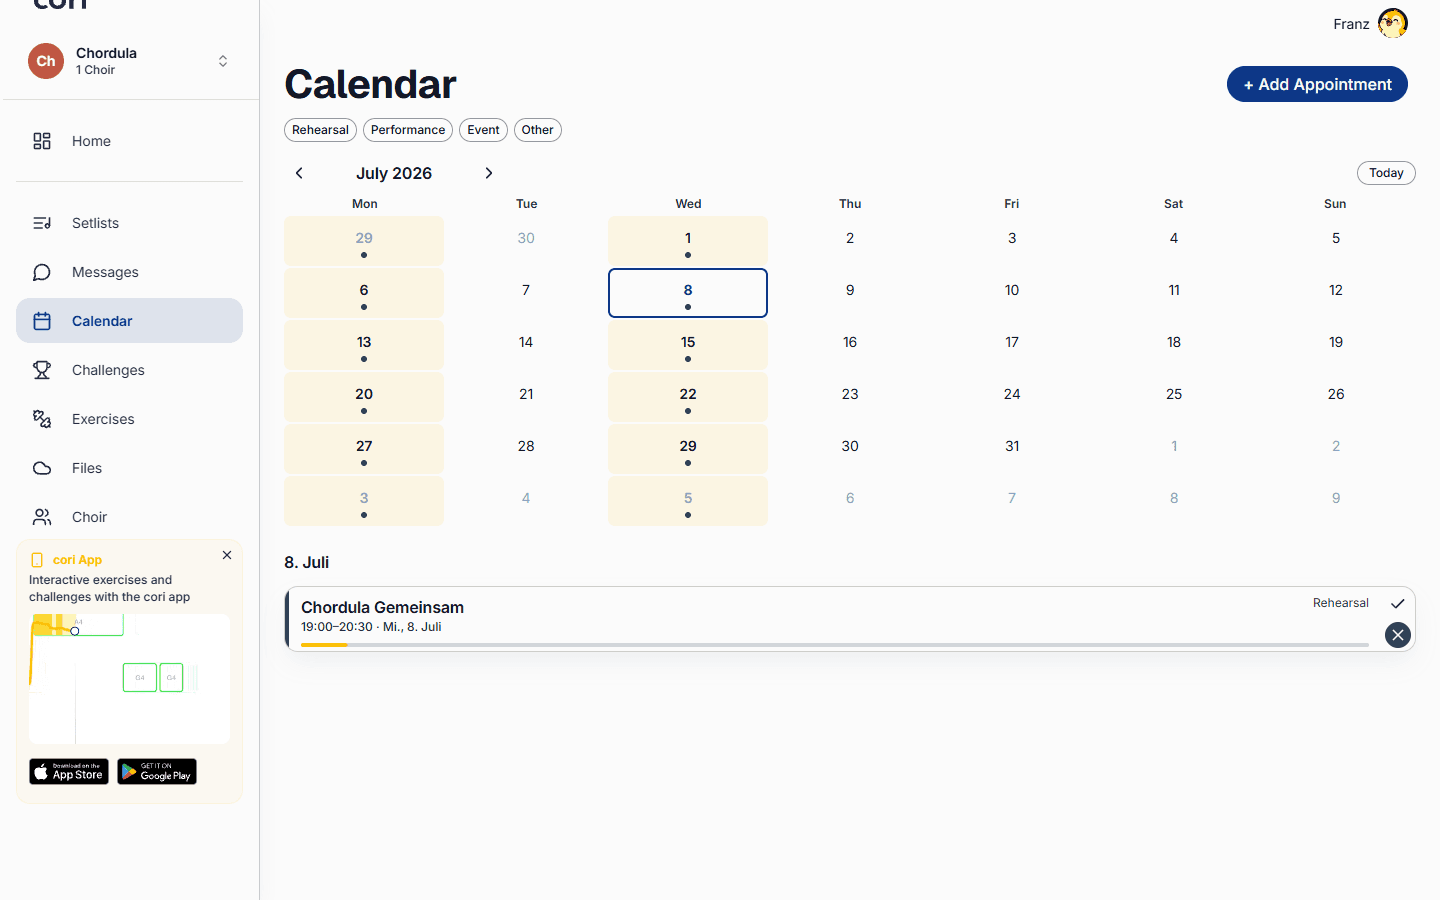
The calendar makes sure your whole choir knows when and where you meet. As a choir director you can add rehearsals, performances and other events, have them repeat and notify everyone, from the web app or straight from your phone.
Only the choir leadership and admins can create and edit appointments. Singers see the calendar and respond to every appointment with their attendance. In the web app you create an appointment by clicking a day in the month grid; that only works for managers. On the phone it's the round at the bottom right of the calendar.
Opening the calendar
In the web app, choose Calendar in the sidebar. You see a month grid in which every day carries its appointments right in the cell: coloured bars with time and name. If not everything fits on a given day, “+2 more” appears underneath, and a click on it opens the whole day in a small window.
On your phone, open the Calendar tab to see your upcoming appointments as a list.
Creating an event
The form is the same on both platforms, only opening it differs.
In the web app, click an empty spot in the month grid on the day the appointment should take place. The form opens with exactly that date and 19:00 prefilled as the start time, so usually all you have to adjust is the time. The appointment always belongs to the choir selected at the top left.
On your phone, tap the at the bottom right. If you lead more than one choir there, first choose which choir the appointment belongs to.
Enter a name (for example “Tuesday rehearsal”) and then choose a type: Rehearsal, Performance, Event or Other. On the web these are coloured chips, and every chip already shows the colour the appointment will later have in the calendar. The type also determines the wording of the notification the members receive.
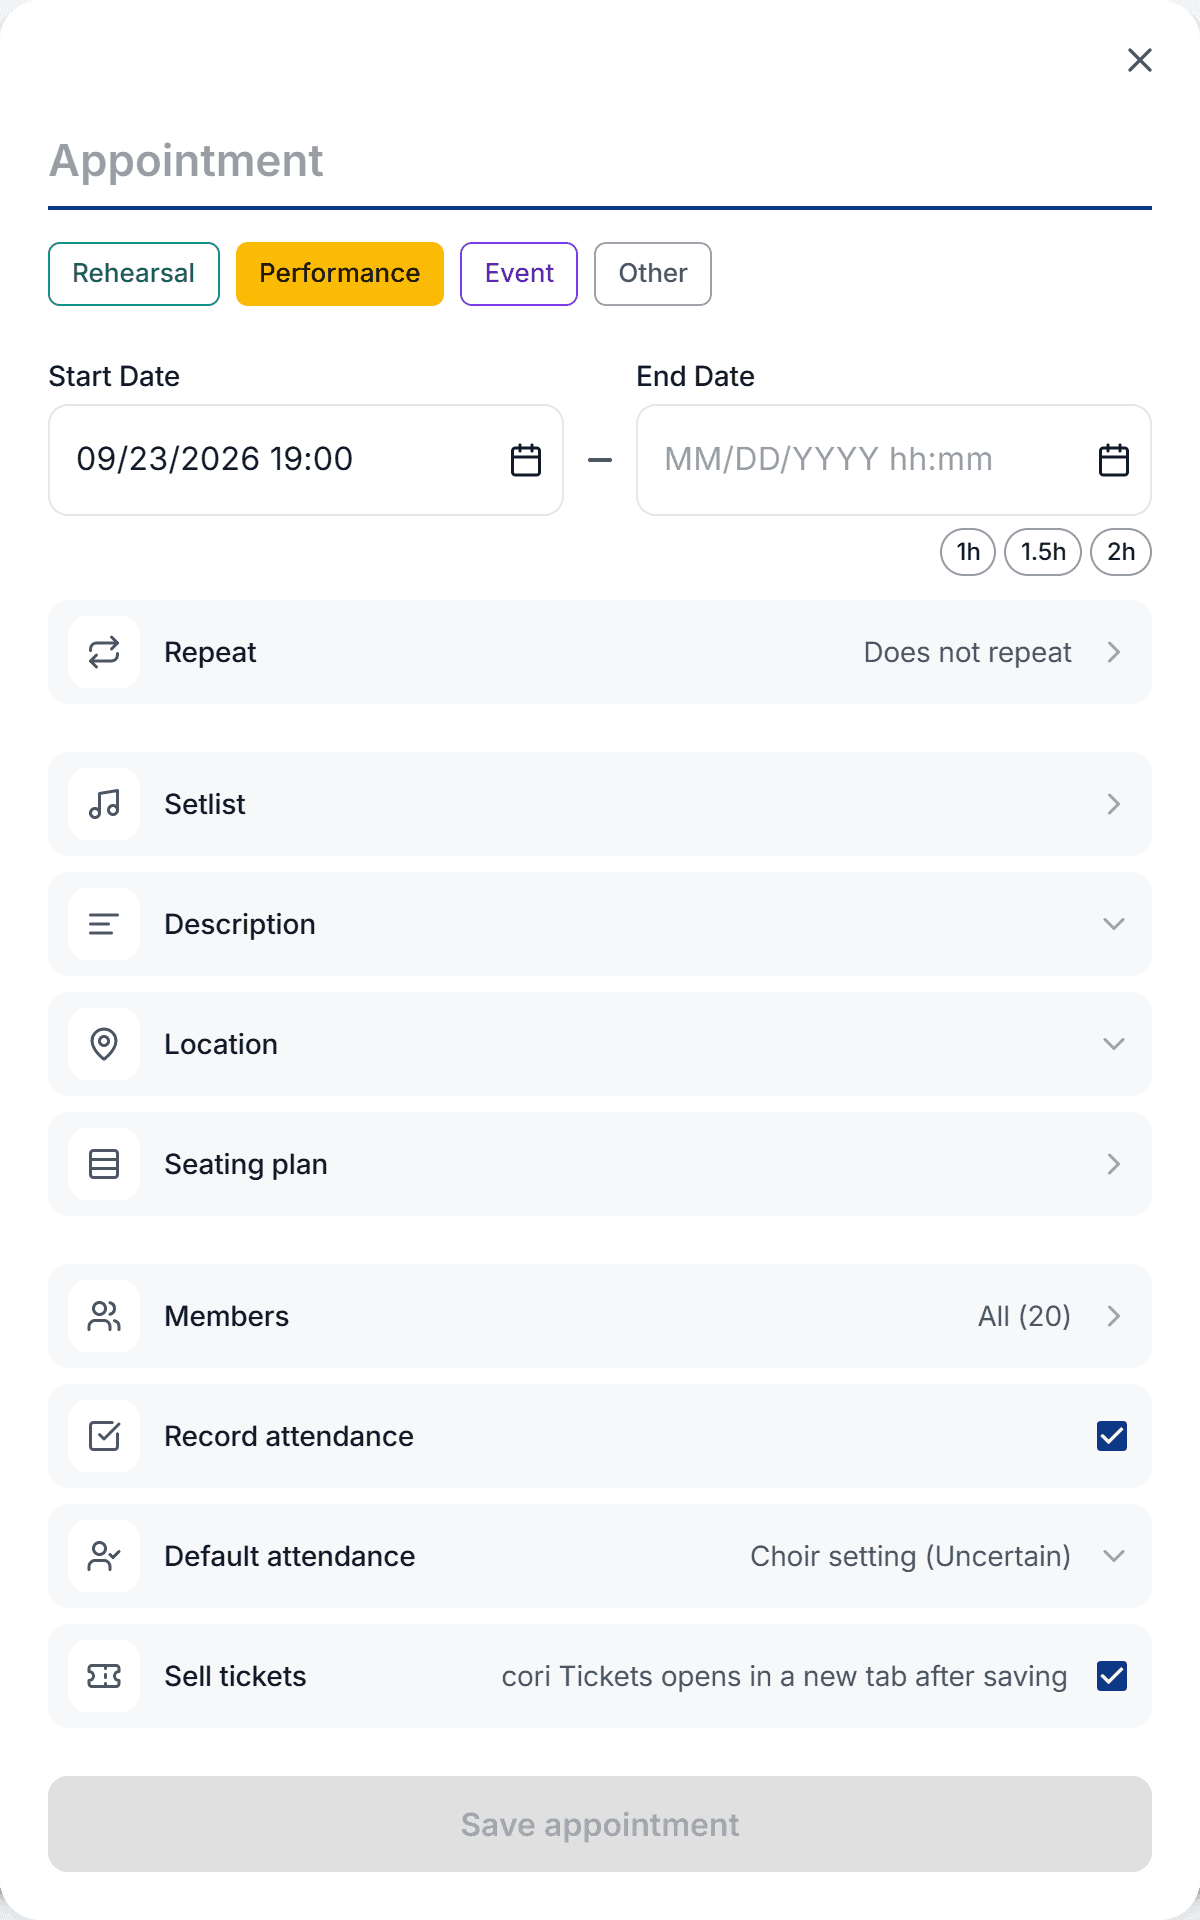
Check the start date. Once a start is set, you can add an end date or use the quick chips (1h, 1.5h, 2h) to set the duration with a single click.
Expand Location to drop a pin on the map, and Description to add notes, links or a programme. You can also attach a setlist so the singers can prepare the right songs.
Click Save appointment. The appointment appears straight away as a coloured bar in the calendar.
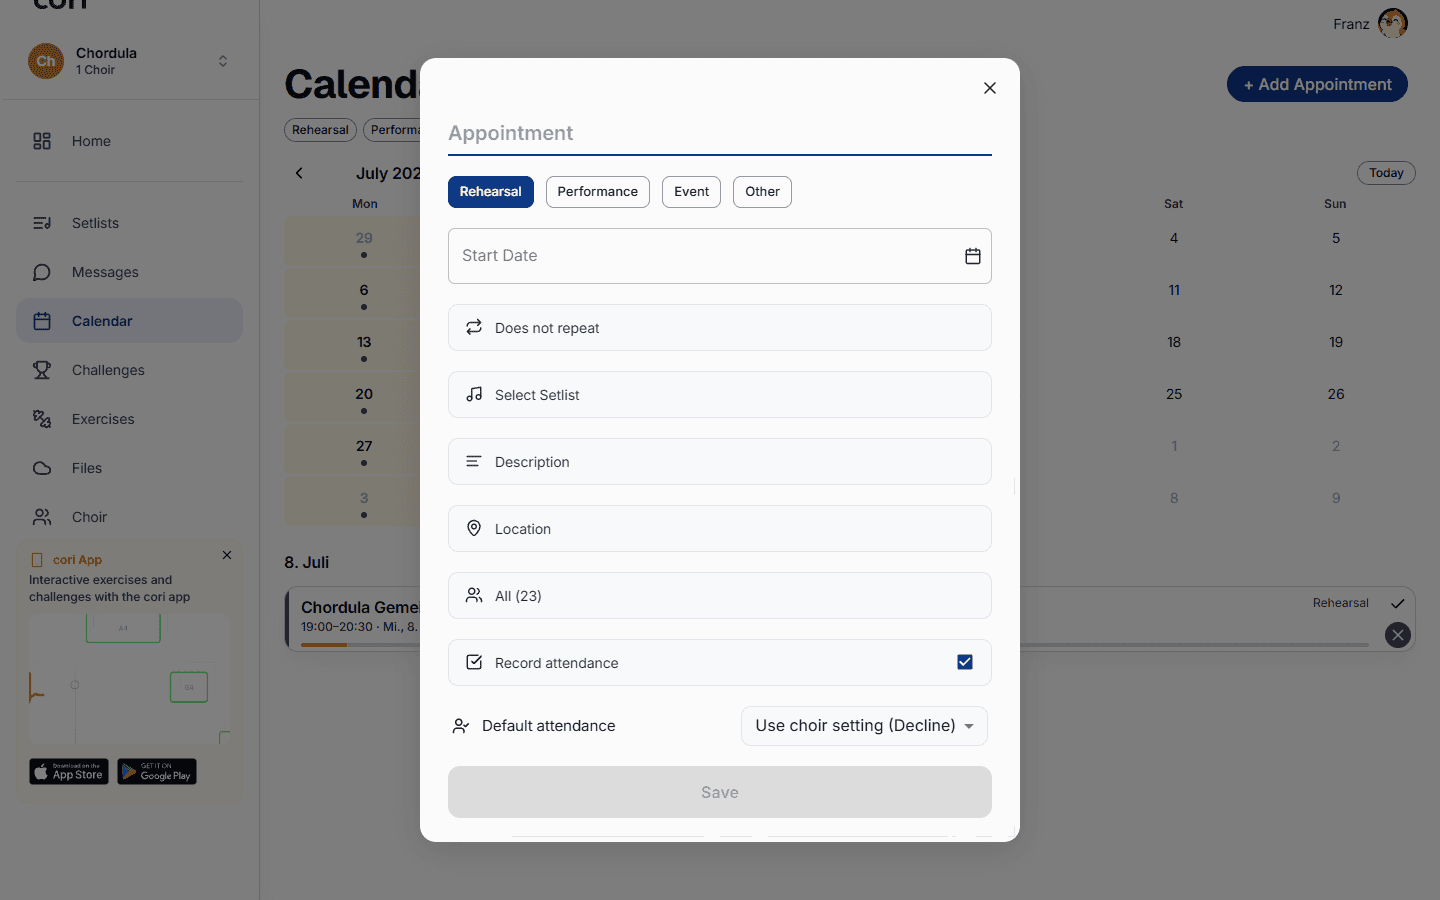
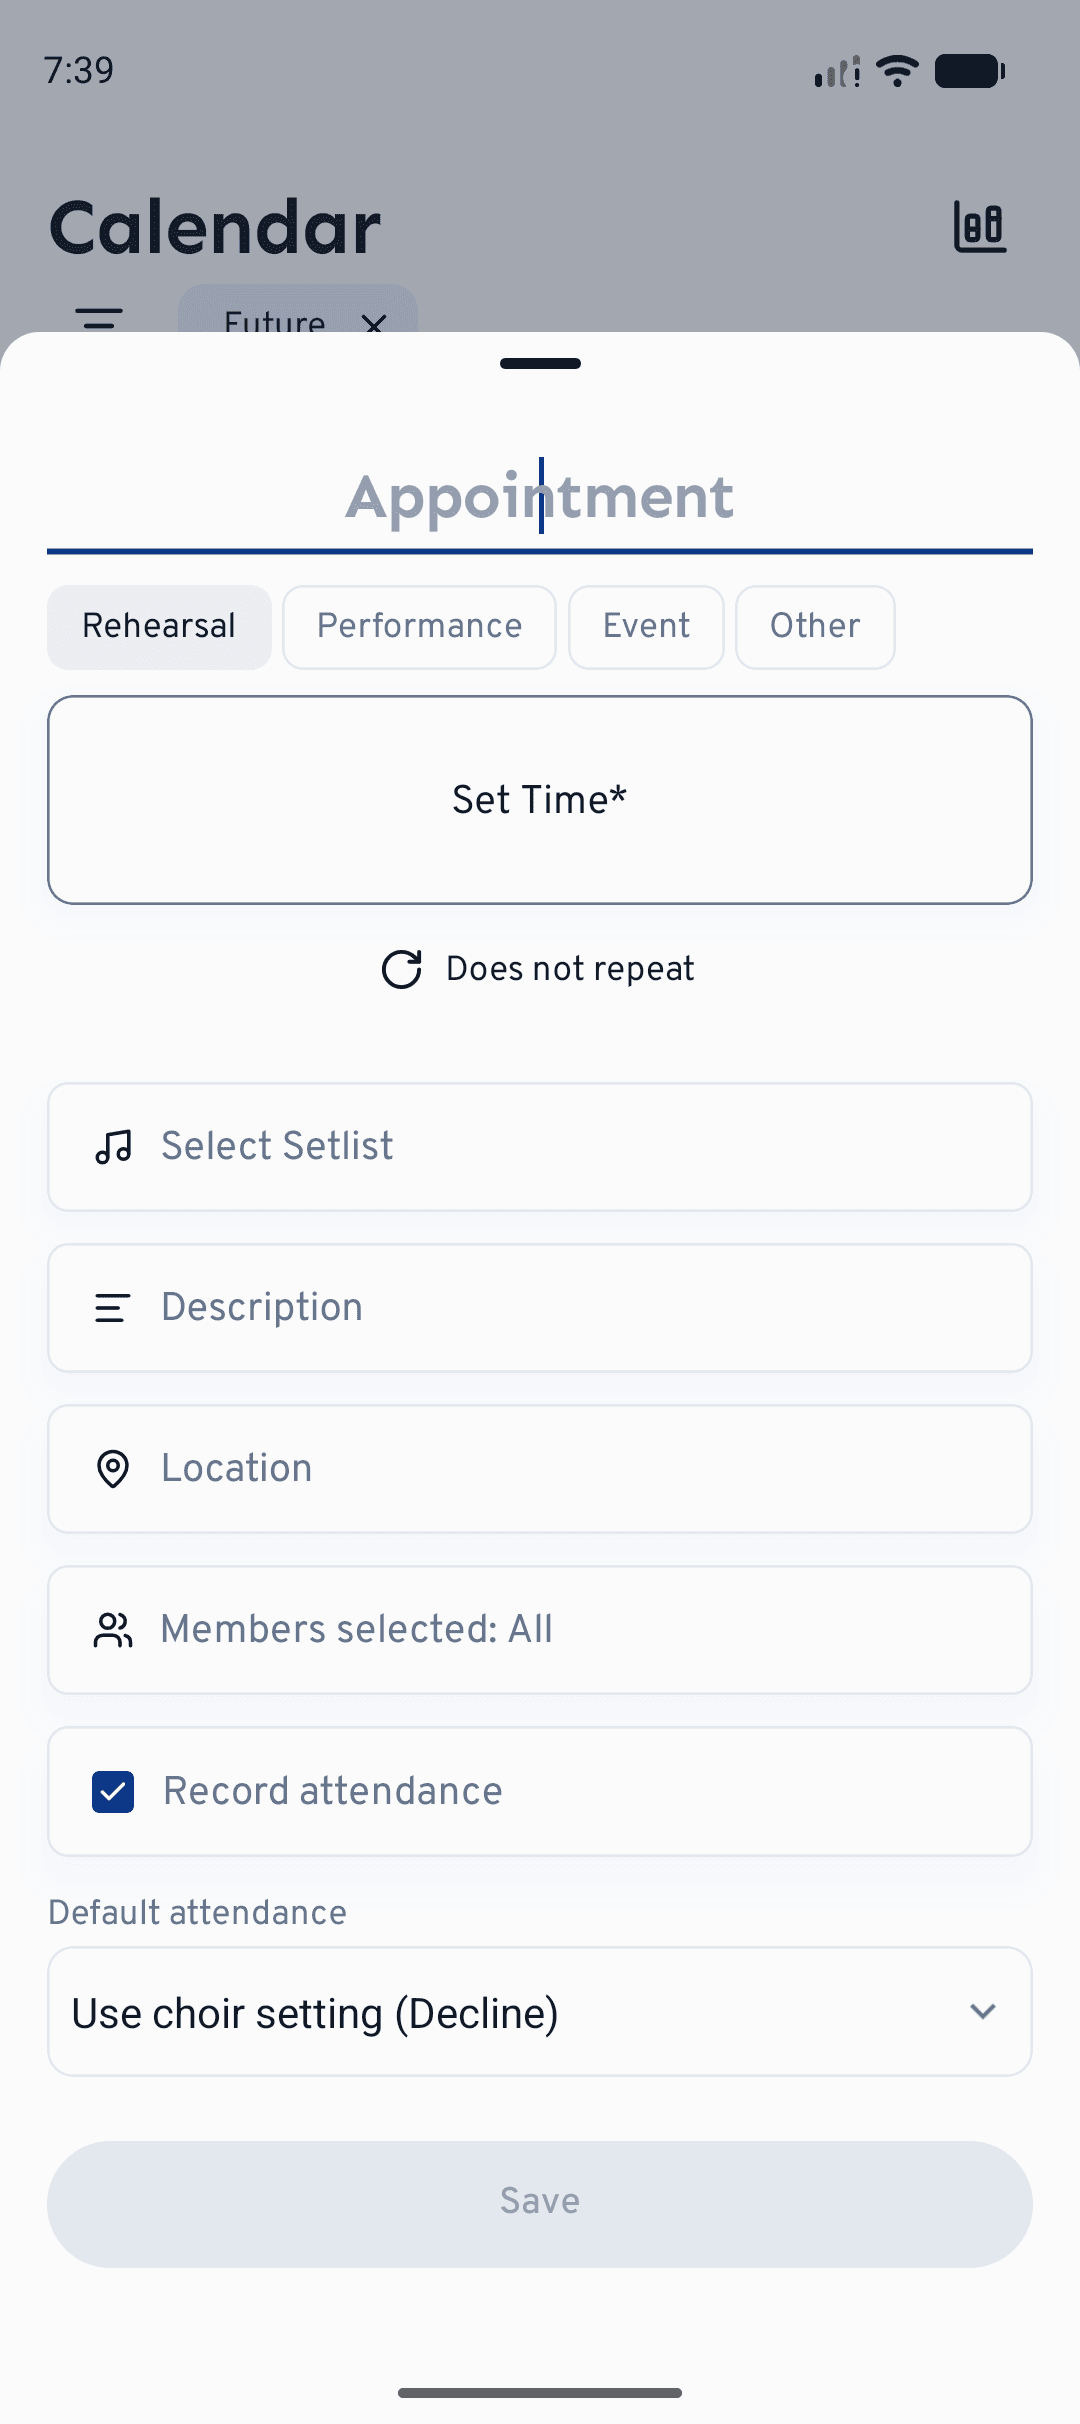
On the dashboard, Quick Actions›Create Appointment also leads straight into the same form, though without a prefilled date.
When you create a new appointment of the type Performance or Event, the form additionally shows the Sell tickets row with a checkbox and the note “the ticket shop opens after saving”. And that is exactly what happens: the appointment is saved first, then the cori ticket shop opens with this appointment already filled in. The option is only there when you create an appointment (not when you edit one) and only for those two types; if you don't save the appointment, nothing is created in the shop either. What happens next over there is described in Creating an event.
Letting it repeat
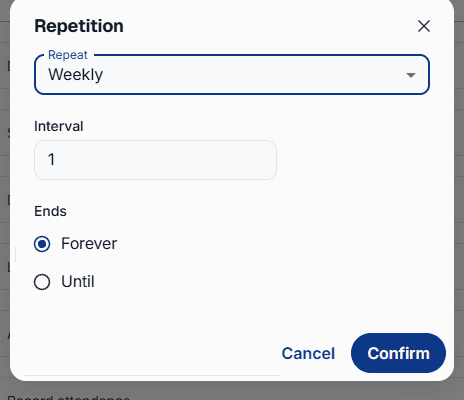
For a weekly rehearsal, or any regular appointment, you don't have to enter every single one by hand. Open the Repeat row, which shows “Does not repeat” by default, and set how often the event repeats.
Choose Daily, Weekly, Monthly or Yearly and set the interval, for example every week or every other week.
Leave it on Never for an open-ended series, or choose Until and a date on which it stops. Confirm to apply the rule.
Open the appointment and tap the , on the web at the top right of the detail page. If the appointment is part of a series, cori asks whether your change applies only to this appointment or to all appointments, so you can move one rehearsal without disturbing the rest. The same choice appears when you delete or cancel a recurring appointment.
Notifying members
By default all members are invited and notified as soon as you save. To address a smaller group, open the Members row and select particular voice parts or people. Only they are notified and asked to respond. Leave Record attendance switched on if you want to track who is coming, and set a Default attendance if most people will answer the same way anyway.
Attaching a seating plan
You can attach a seating plan to every appointment: who stands in which row next to whom. Creating and editing only works in the web app. In the app on your phone the seating plan is there to look at; if you tap Seating plan in the appointment form there, cori reminds you with “Only in cori web” that seating plans are made in the browser.
You'll find it in the appointment form below Location. It's best to pick who's invited under Members first: a new seating plan starts with exactly those members (with the whole choir if you don't pick anyone), each in their voice part.
If another appointment already has a seating plan, cori asks you first: Create a new seating plan or Take over from an appointment. If you take one over, cori matches the singers with the people invited to this appointment along the way.
The editor opens with a seating plan already worked out. On the left (at the bottom on small screens) sit the Singers and Voice Parts tabs. On the stage you drag singers to a different spot with the mouse. Use Edit stage layout to add or remove rows and spots; cori carries the existing arrangement over to the new stage. At the bottom you pick a formation (“Sectional (Rows)” or “Mixed (Quartet / Scrambled)”, for instance) and have it redistributed with Generate Layout. If singers are already on the stage, cori checks with you first, because spots assigned by hand are lost in the process.
Click Save in the editor. The row in the form then shows how many singers and rows the seating plan has. It's saved together with the appointment, so finish with Save appointment. Use the cross on the right of the row to take the seating plan off the appointment again.
If you've invited or uninvited members afterwards, open the Singers tab in the editor and click Sync members. cori adds the new people and takes out the uninvited ones.
With a recurring appointment the seating plan belongs to the whole series; the editor points this out with “Applies to every date in the series”. Later you can also edit a seating plan directly on the appointment's detail page, via the on the Seating plan card.
That card is where your choir members see the seating plan, on the web just as in the app, with their own spot marked and described in words (“You stand in row 2 of 3, between Anna and Ben.”, for example). In full-screen view, Show my spot jumps straight there. Singers only see names, voices and spots. Whatever the choir leadership has noted down for planning (who should stand next to whom, say) stays with the choir leadership.
If you built a layout in the free choir layout planner on the cori website and signed in afterwards, it's waiting for you in the calendar: “Your layout from the planner is here”. Attach it to an existing appointment there via Choose appointment, or create a fitting one right away with Create new appointment.
What's next?
- Find out how singers respond and how you track the responses, under Attendance.
- Keep a full calendar tidy with calendar filters.
- Understand what the four appointment types and their colours stand for.
Still need help?
Can’t find what you’re looking for? Send us a message and our team will get back to you.
Contact support